Sunday, September 28, 2014

10 Ways to Decorate Pumpkins (without carving them)


I dont know about you, but I am awful at carving pumpkins! I love doing it- but I can never make it look good. I've kind of decided to start painting mine or using modge podge and glitter to decorate it. That way it doesn't rot or wither. Here's my top 10 fave ways to decorate your pumpkins this season!

**side note**
These pictures are not mine. I took them from the website that they were made/or the idea was found on. Click on the 'click here for details' to see how it was made and where it came from! 

Cover pumpkin with a vinyl monogram (or paint the monogram on it)
This is classy, easy, and simple. Perfect for Halloween OR Thanksgiving. 

Buttons and Ribbon
This one is really cute. Buttons are cheap and can be bought by the color. I buy grab bags of buttons off amazon, ebay, or at hobby lobby. So you really could do any word or color! 

Glittered Pumpkin
This one is super fun. Everyone likes a little sparkle. I did this one year with modge podge and it was messy. But I hear if you use spray adhesive instead its a lot easier. I will try it again this year. 

Lace Covered Pumpkin
This kind of reminds me of a spooky/darker type of decoration. One with spiders, cobwebs, old books, etc. You could use an old pair of tights for this maybe..? Most likely it was done by some fabric though. Would be cute on orange or white pumpkins. 

Confetti Pumpkins
This one is really easy too! I love confetti. 

Bat Flying Pumpkin
This is such a fun one. Using your digital cutting machine (silhouette or cricut) would make this project really quick. 

Spray Paint and Polka Dots
Almost everyone has a can of black spray paint lying around. Stick some yard sale round stickers on it, spray paint, let it dry, then take the dots off! Look how easy that would be. 

A Witch Hat and Rhinestones
I think this one is my favorite. I LOVE it. 

Simple Bow
This is one that could also be used for Halloween or Thanksgiving. Classic, cheap, easy. 

Mummified Pumpkins
This is a fun one for kids. Get some medical gauze and googly eyes and you're set!

I hope you enjoyed those 10 carve-less pumpkins! Make sure to visit the sites for all the details on how they are done. Happy decorating! 


Sunday, September 21, 2014

Halloween Printables (FREE!)

I LOVE Halloween!! It's most definitely my favorite time of year. The decorations are so fun. As you know I love creating printables.. So here are 3 for you to download, FREE! Download, print, and frame them for your decorations. I want to see how you use them in your home. Email me at themohlmans@live.com and I might just feature your decor :) 

Feel free to download as much as you want and share. Just don't forget to give credit where it's deserved! (in other words please don't steal the images as your own!)


Wednesday, September 10, 2014

individual strawberry shortcake cups


I am definitely NOT a great baker, or cook. In fact, I really don't even enjoy it! But, it's what you do when you are a wife and mom, so I do it. :) For a recent family dinner we had with my husband's side of the family, they asked me to bring the dessert. Lets be honest- I had no idea what I was going to make! My brother in law owns a catering business (Utah Custom Catering) and my sister in law makes cakes and cupcakes. And they wanted me to bring the dessert? Yikes! I thought about bringing a poke cake, or store bought cookies. I really wanted to do something yummy though, so I came up with this fun and easy dessert- Strawberry Shortcake Cups! It was a hit, and everyone was asking for more. I will definitely be making these again. 

Here is what you will need: 
Angel Food Cake
Strawberries
Cool Whip
Vanilla Pudding 

Normally with Strawberry Shortcake you don't use pudding. But I thought adding pudding would make it a little more exciting. 

All I did was take the shortcake and break it up in little pieces. I layered the cake first, then the vanilla pudding, strawberries, more cake, cool whip, and a few strawberries on top. 

I used clear plastic cups so you could see inside of it and to make it look like a trifle. This would also be delicious with chocolate pudding, chocolate cake, oreos, and cherries... That is what I will have to try next. 

Make it and enjoy it! 

mini paper bag scrapbook

Have you ever seen these cute paper bag scrapbooks? They are so much fun to make! I'm not huge on scrapbooking unless it's digital, but these are different. They are smaller, don't have to be as elaborate, and take much less time! Unfortunately, I do not have a tutorial at this moment- but here is a great one I found online- http://www.scrap-a-little.com/2010/04/paper-bag-album-tutorial-by-kristie.html. 
Hopefully I can get a tutorial on here soon! 

Now, lets talk about the one I made. Like I mentioned in the past post, I was part of an instagram swap and the theme was "rise and shine". I decided to make this little scrapbook for my swap partner to put pictures of her kids in it. I used bright, fun colors, and kept it simple so she could customize it however she wanted! 

Things you will need for this project are paper, glue stick or hot glue, embellishments, paper bags, a hole punch, and some yarn. I got my paper at Pebbles in my Pocket here in Orem. (FAVORITE store ever). I chose coordinating papers from the same line. Makes it much easier. Some of the things I used to decorate the pages are stamps, stickers, and other paper embellishments. 

I love making these. The first one I ever made was for my husband Kevin. We were dating- it was our first Valentines together. We had been together for 6 months and had talked about getting married. I printed pictures out from our 6 months of dating and on every page I wrote dating stories, how we met, our first kiss story, etc. I gave it to him for Valentines Day. Although he didn't really appreciate it, I am glad I made it for him because now we can both enjoy it :) 

These scrapbooks are the perfect gift for anyone and can be done while sitting down watching a movie. The fun thing with this is that you can staple it, use eyelets, hole punch it and use yarn or ribbon, and you can cut the bags in any shape! If you want some more fun ideas of paper bag scrapbooks, check out my pinterest board!

I hope you enjoyed my project! 

Wednesday, September 3, 2014

rise and shine

This last month I participated in an instagram swap. It was so fun- I am sending my package off tomorrow and am SO excited to get my package any day  now! I've enjoyed getting to know my swap partner (Alicia) and love that I've made a new friend. The theme of the swap was rise and shine.We had to put together a package full of things that had to do with that theme. Let me tell you a little about that phrase... It's not my favorite phrase. Ha. I am not a morning person. Having children has forced me to be a morning person, but I still dread the sound of my alarm (my kids crying or telling me to wake up). I can rise just fine but shining is a little harder ;) 

The things that help me rise and shine are: smiling faces on my kids, a bowl of cereal, a kiss from my husband, and time to get ready for the day without interruptions. It's nearly impossible to wake up to a stress free morning it seems- getting everyone fed, diapers changed, people dressed, keeping kids happy, (and quiet while my husband sleeps since he works grave yard shifts...) BUT- this theme has really been on my mind lately and I'm trying to go with the flow. Everything doesn't have to be perfect. Kids dont have to be out of their pajamas at a certain time, I dont have to always wear makeup, having a bowl of cereal and not something like eggs or french toast every day isn't the end of the world, it's okay if I feel like I need a diet coke to get through my day... I can go with the flow! Yes it's good to have routines but with this theme on my mind I have been able to focus on just rising and SHINING (meaning being happy in my mind) with life. 

So, I made this printable to print out 8x10 or 11x14 for a frame in my bedroom. Hopefully it will be a reminder of why I wakeup every day- and why it's important to wake up happy for my kids. (and me, lets be honest). The way my morning goes usually sets the tone of how the day goes. So- this is my morning mantra! Go ahead and right click and save- print out, and use if you would like! (please just give credit if you share it). 

How do you rise and shine?  


Tuesday, August 19, 2014

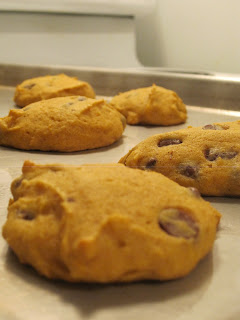
Pumpkin Chocolate Chip Cookies

Where I live, school started for most people today. My husband goes back to school next Wednesday. So not looking forward to it. But graduation isn't too far away (hopefully April!) so I have to be excited! 

Whenever school starts back up, I am ready for fall to come. Ready for the crisp air, pumpkin foods, fall smells, colorful leaves, all the decorations and holidays.. Its my favorite time of year. Seeing that school started today then, I wanted to share a delicious Pumpkin Chocolate Chip cookie recipe! 

So, I cracked open this cookbook. This, my friends, is the McClarkies cookbook. Compiled with recipes from the 11 children in my family and my mom. My mom and dad made these for all the kids one year for Christmas. 

I will share with you the secret EASY super delicious moist cookies. 
Here is what you will need: 
1 cup sugar
1/2 cup butter (or margarine) 
1 egg
1 cup pumpkin
1/2 cup nuts (optional)
1 tsp vanilla
1 tsp baking soda
1 tsp cinnamon
1 tsp baking powder
2 cups flour
1 12 oz. bag chocolate chips


Mix the ingredients in order. I like to cream my egg, butter, and sugar before I put anything else in. It makes the cookies fluffier and softer.

After you cream the first ingredients, go ahead and put the rest in except for the flour. Mix it all together again like in the first picture. Then, add your flour at the end. 

It should look like this, and taste freaking delicious.. Someday I will prob die from salmonella.... 


Add your chocolate chips in. As many as you want. Lots. 

Set the oven for 350 degrees. Grease a cookie sheet, plop on the cookie dough, and cook for 14 minutes. 

Yum. Yum, yum!!! They are the easiest cookies. I love the taste... so harvest-y! 

Hope you enjoy!


Tuesday, August 12, 2014

Sewing adventures

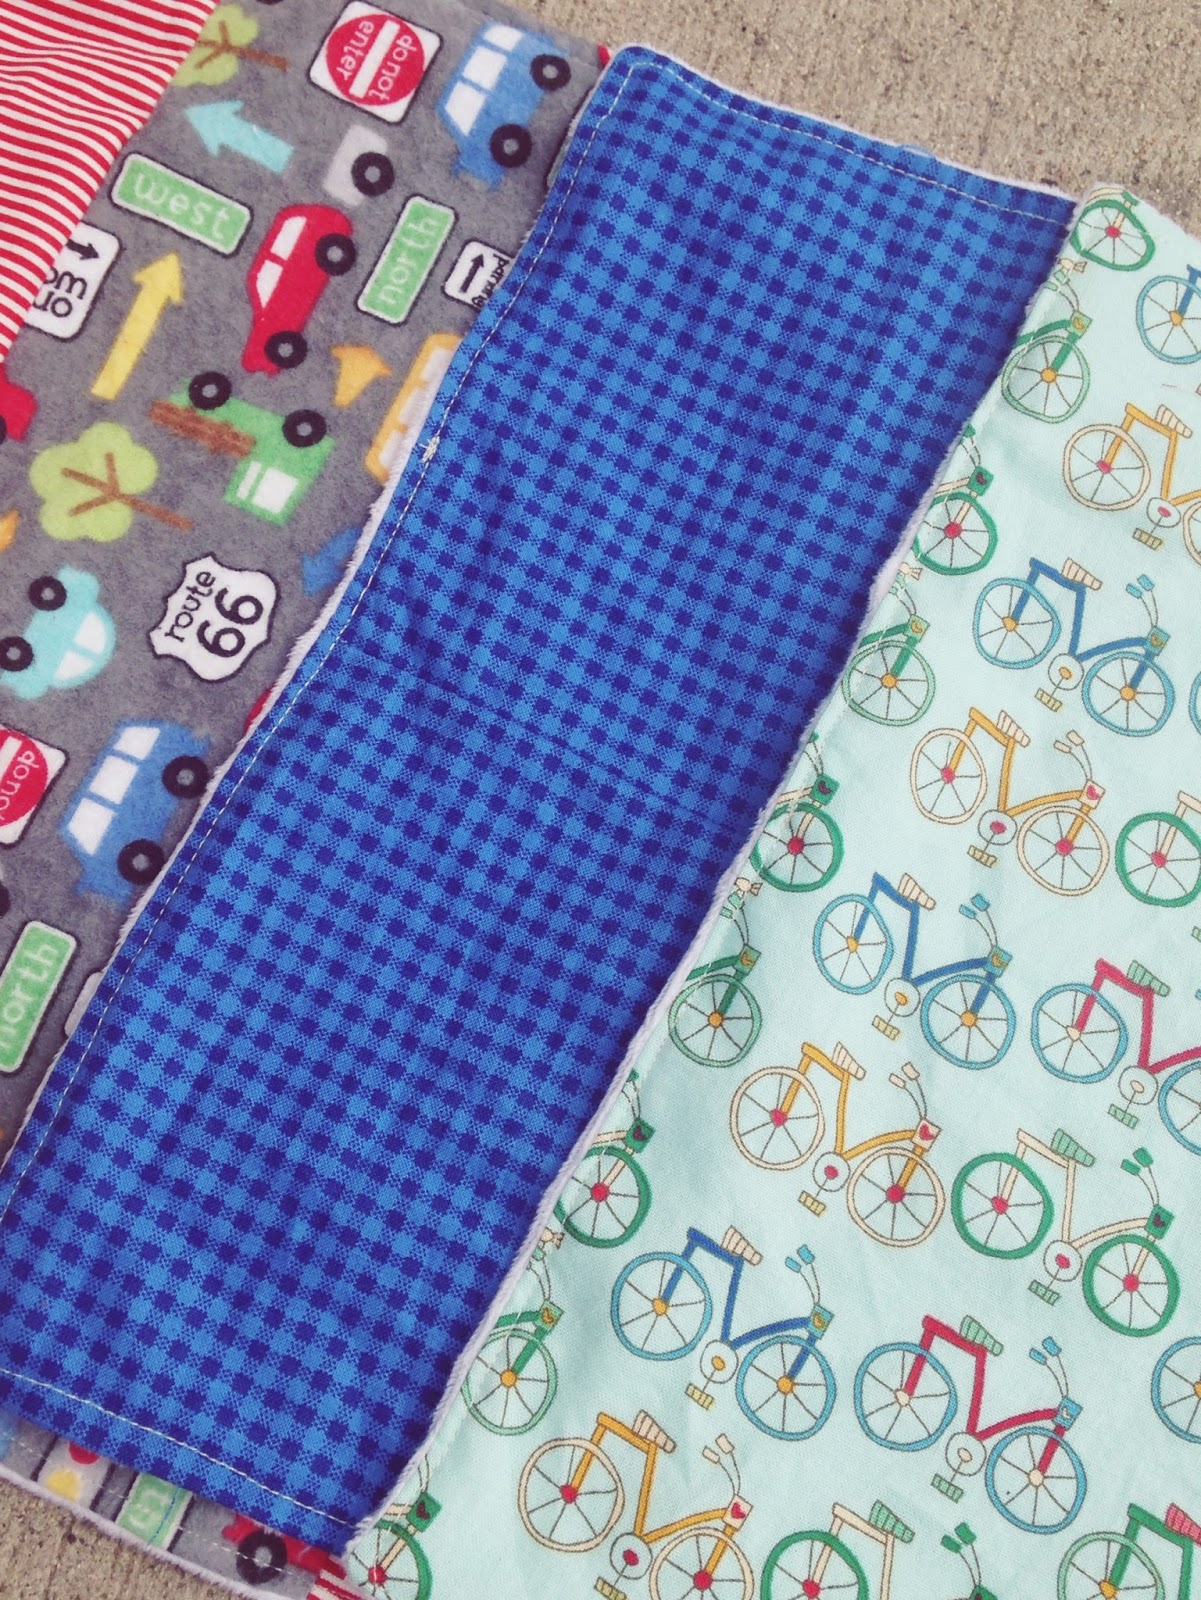
I've always wanted to be a master sewer. But I totally am not. I have been teaching myself and pretty much all I can do is sew straight lines! I've taken a liking to making burp cloths. I have a client (hair client) that makes BEAUTIFUL blankets (SewSara) and when she has scraps, we trade! I cut her pretty little hairs and she gives me her pretty little fabrics. I am always amazed at the beautiful prints I find. For real. Here's a few burp cloths I have made recently: 

who doesnt love cherries?!


I am ready to up my sewing skills. I need to start making new things. This is on my short list to do and learn: 
We need this nap mat. Not just want. Need. Haha. It looks like it wouldn't be too hard. 

 Curtains! We dont have any curtains in our front room and I would love to add some to give the room some color. These look super easy. 

And... leggings! Seriously, Im loving all the baby leggings I have been seeing. But $25 a pair? I think i'd rather make them. So I think this one is at the top of my list. 

What's on your sewing short list? Comment below or on my instagram using #sewingshortlist. To check out the tutorials for these cute projects, look on my pinterest: http://www.pinterest.com/gillianmohlman/things-to-attempt-to-sew/

O"fish"ally ONE

My baby turned one on July 25th! I seriously cannot believe how fast this last year has gone by. He is the perfect baby. Really. He is almost always happy. Such a chill baby and easy to please! 

Being that my budget is very limited, I tried to do something small and easy and cheap! I loved all the under the sea themes on pinterest but I just could not afford to do everything I wanted to do. So this was what I came up with- "Mckay is oFISHally one!" 

I set up some tables outside of my apartment and invited a few close friends and all of our family. We had so many people come and we are so appreciative of all of you! 

For the food, I just did snacks. I got all my buckets for a dollar each at Target. The scrapbook paper under the buckets is from Pebbles In My Pocket in Orem, UT. Here is what was in the buckets:
1- 'sun'chips
2-goldfish
3-swedish fish
4- 'fish bait" (gummy worms)
5-'beach balls" (m&m's)
6. "floaties" (life savers). 

We also had cut up fruit- peaches, strawberries, and apricots. (I totally forgot to put out all my cut veggies.. grrr). I then cut up mozzarella cheese to be 'shark teeth". We had water for 'ocean water" and juice. 

Mckay's cake was my favorite thing about his party. My sister in law Jen is a master cake maker. Seriously. She has made some of the cutest and most beautiful cakes I have EVER seen. I wanted something super simple and small for him to use as a 'smash' cake. I also wanted it to resemble some sort of water/waves. So she came up with this! Fondant ruffles around it to make it look like waves. And you know what- it tasted freaking good. If you need her to make you a cake, email me and I will pass her number on. 

Here is a closeup of the cake. She even made the cute banner! Little fishy cut outs were cut by me on my silhouette, and the scrapbook paper under the cake is from Pebbles in my Pocket in Orem, UT. 

 I also made a happy birthday banner! (Thanks Kamryn for helping me string it through!) I made that with my silhouette too with the paper being from Pebbles in my Pocket as well. 

He loved all the attention, loves, and yummy vanilla cake! We had water balloons and a little pool set up for the kids. I think he had a great time with all the people who came. 

So- lesson learned: you can still throw a cute party without loads of money. This was definitely a party on a budget but I am so happy with how it turned out! The most important thing to us were the people there, not the things or the way it looked. (although those things were fun too.)

Happy One Year Birthday little man, mommy loves you!

Tuesday, June 3, 2014

Recycling Soup Cans Part 2: Flower Pots


This is part 2 in the recycling soup cans series I am doing. If you'd like to see the first one- check it out here

This was inspired by a lesson I gave to my cub scouts. I taught them how to plant herb seeds for the requirement "grow something". We did it by doing the same technique I will be showing you how to do! 

Here is what you will need: 
Soup Cans (washed and goop cleaned off) 
Potting Soil
Flowers
Hammer
Nail
rock pebbles 
any embellishments you want to decorate them with

Here's my cans. I used goo be gone to get off the rest of the goop on the can. Two of my cans were tomato sauce cans so they were stained red inside. That wont matter though, because they will be covered. 

The first thing you want to do is take your nail and hammer in a few holes in the bottom of the can. This will allow extra water to drain out the bottom. 

I did 5 holes. 

I then went outside and found a bunch of rocks this size: (Get rocks smaller than pennies probably...I think mine were too big.) 

I bought this Miracle Gro Pitting Mix at Walmart. It was super cheap- I want to say 3 or 4 dollars??

I also bought my flowers at walmart. I liked the variety of color :) You will then put the pebbles in the bottom of the can. On top of that, put some potting mix in. Remove the flowers from the original plastic containers and place in the can. 

 I packed some more soil around the top to fill it up, then watered them. I just kept it simple with bakers twine tied on it. Look how simple! 

Just a few tips- keep them in sun, and don't over water! If you over water the soil will become so soggy with no way to dry out because of the small holes on the bottom. *Lesson learned...* 

I'm loving these cans! Are you saving yours yet?

p.s. check out my profile on pippit! pippit is like blogging, pinterest, and instagram smooshed into one app! The app should be available in the apple store and google store. follow me at handmadebygill and I will follow you back. 


Tuesday, February 25, 2014

Lucky Printables- FREE

I really enjoy cute printables. And I like them even more when they are FREE! I decided to make a few St. Patrick's Day printables for you. More will come in the next week or so. For now, enjoy these two 'lucky' prints. Made to be printed as 8x10 or smaller. Enjoy! 

*you are more than welcome to share these pictures and use them as you please.. just make sure to give credit back to me. Thanks!*


Monday, February 24, 2014

Framed Recipe

This is just a quick post. I just wanted to share a post about a special gift I got for Christmas. My sister in law Lisa gave all the girls one of these.

My husband's grandma lived to be 100. She had beautiful handwriting! I never actually got to meet her but from what I heard, she was a wonderful person. When she passed away, Lisa inherited the recipe book from her. For Christmas this year, she decided to take an original recipe and frame it for us. 


Sorry- the pictures are blurry, I took with my phone! As you can see, on the back of the frame, Lisa added a note about how the recipe is from grandmas recipe book and how beautiful grandmas handwriting was. 

Now I am going to raid my mom's handwritten recipe book so I can have a framed recipe of hers! 

Great way to decorate your kitchen right?! Also a great gift idea. Thanks Lisa!